Creating an email account is an easy task and is performed through SPanel. This article will discuss the steps required to create a new email account for your domain.
Pre-requisites
Before you begin, ensure you have:
- An active and eligible shared or dedicated web or email hosting plan.
- An active domain name that is connected to your web hosting account.
Step 1 - Log In to SPanel
From a compatible web browser, log in to your SPanel by visiting the SPanel URL for your web hosting account as per the Welcome Email. You will need to enter your username and password if you follow this method.
Alternatively, you can log in to your SPanel from your My Moohost account by clicking on the Login to SPanel button from the service details page of your hosting:
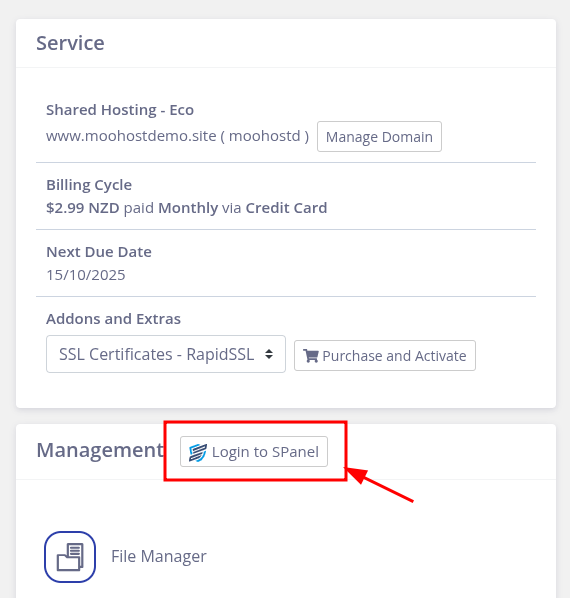
You will be logged in directly to SPanel from your My Moohost account, you will not be required to enter your password.
Step 2 - Access Email Accounts
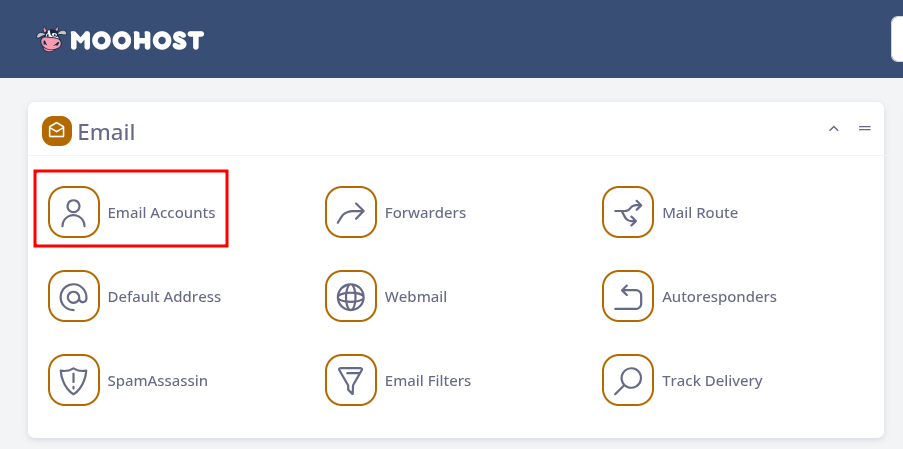
Once logged in to SPanel, click on the Email Accounts option to list any email accounts you already have, or to create a new one:
Step 3 - Create Your Email Account
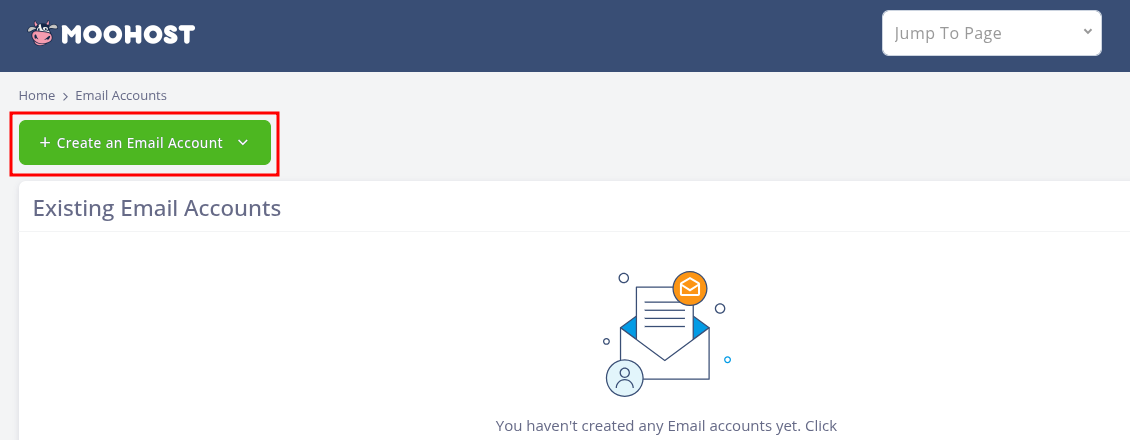
On the Email Accounts page, click on the Create an Email Account button at the top to start:
Once the options load, do the following:
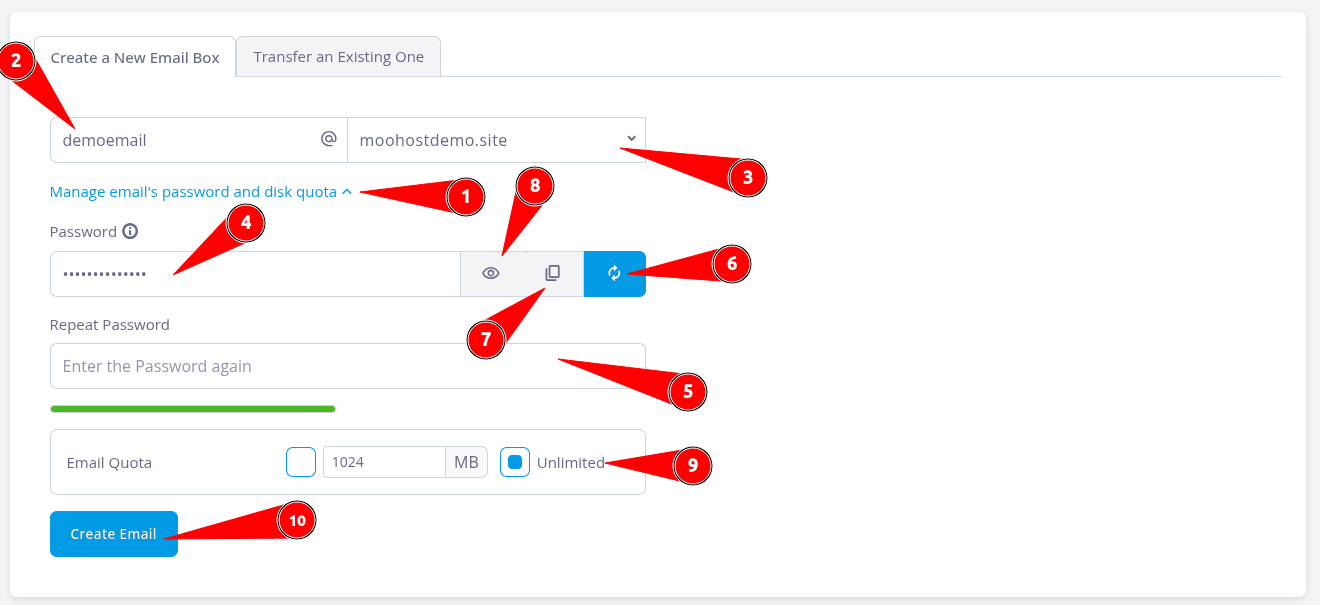
- Click on Manage email's password and disk quota to bring up additional options.
- Enter the first part of the email address in the Enter an Account Name field.
- If you have multiple domains, choose the one you would like to create the email for using the dropdown list.
- Enter a strong password in the Password field.
- Enter the password again in the Repeat Password field to confirm.
- Optional: Clicking on this will generate a random strong password.
- Optional: Clicking on this will copy the password that you have entered or generated.
- Optional: Clicking on this will temporarily reveal the password you have entered or generated.
- Select a quota for the email account from the options available.
- Click on Create Email once done to create your email address.
Once the email account has been successfully created, SPanel will show a success message and provide you with a few options:
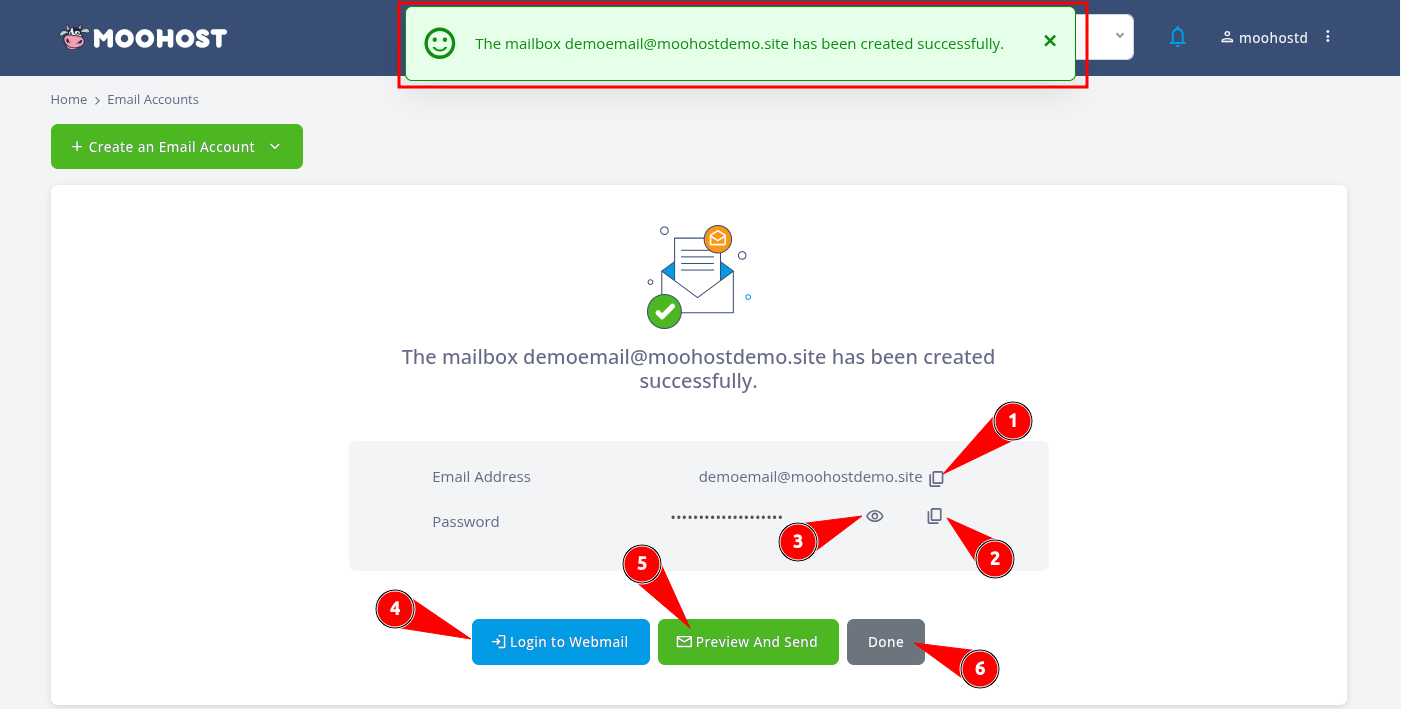
Depending on what you wish to do next, you have the following options on this page:
- Clicking here will copy the full email address you have just created.
- Clicking here will copy the password you set up for the email account.
- Clicking here will temporarily reveal the password you set up.
- Clicking on the Login to Webmail button will log you in to the new email account's mailbox in Roundcube webmail.
- Clicking on the Preview And Send button will open up a dialogue box where you can send important details about this email account to another person. This is particularly useful for sending information about setting up an email client for the new email account.
- Clicking Done will return you to the list of Existing Email Accounts.
