If your web hosting plan allows you to have more than one domain, you can use the instructions in this help article to add an addon domain. Addon domains are not available on all hosting plans and are not to be confused with subdomains.
Before You Begin
To successfully follow this guide and add an addon domain, please ensure that you have:
- An active and eligible web hosting plan.
- A compatible laptop or desktop computer with a compatible web browser.
- An active and stable internet connection.
- A domain name registered to you which is active.
Note: If you would like to change your primary domain to the one you're adding, please create a support ticket.
Step 1 - Log In to SPanel
From a compatible web browser, visit https://yourdomain.co.nz/hostpanel (be sure to substitute the domain name with your existing domain name on your web hosting plan):
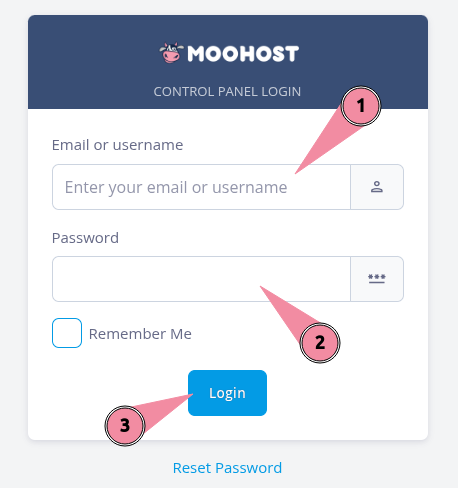
- Enter your username or registered email address in the Email or username field.
- Enter your password in the Password field.
- Click on Login to log in to SPanel.
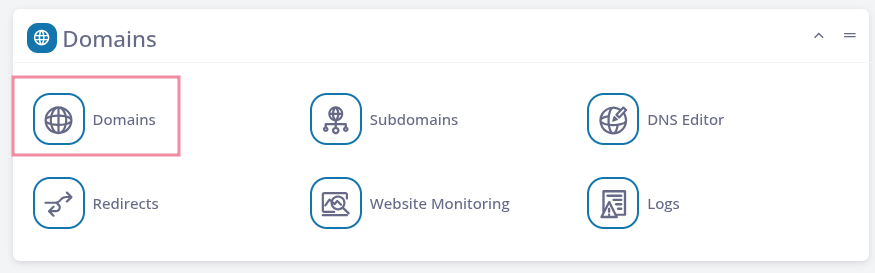
Step 2 - Access Domains
Scroll down to locate the Domains section and click on Domains to continue:
Step 3 - Add Your Domain
SPanel will show you all your existing domains. Do the following to finish adding a new addon domain:
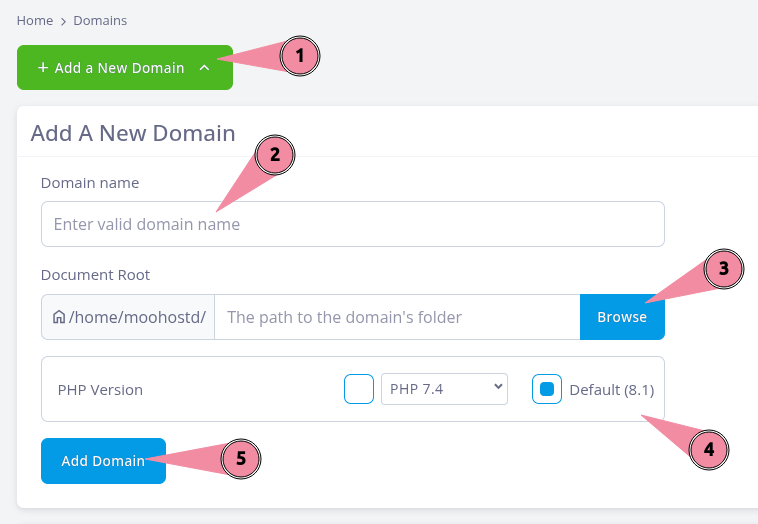
- Click on Add a New Domain on the top of the screen to bring up the options.
- Enter your addon domain name in the Domain name field.
- Optional: Configure a document path for your new addon domain. In most cases, it is best to leave this field blank.
- Optional: Select a PHP version for your new addon domain. The default PHP version should be sufficient for most cases, but if you need a specific supported PHP version, choose one from the list and select it.
- Click on Add Domain to finish adding your addon domain.
Note: Ensure you update the nameservers of your addon domain to point to your web hosting account to:
ns1.moohost.co
ns2.moohost.co
To allow your website to be seen by its visitors.
ns1.moohost.co
ns2.moohost.co
To allow your website to be seen by its visitors.
